Monday, September 21, 2015

The Donald Duck Truck: RV Remodel into a UO Tailgater


Fall is our favorite time of the year. We love crackle of dead leaves under our feet, we use the code word "PSL" when we head down to Starbucks for our annual Pumpkin Spice Latte, but most of all...we love NCAA football.

Our team, to no one's surprise, is the Oregon Ducks, and we spend many glorious fall afternoons tailgating at Autzen.

Many years ago, when I was just out of college, we spent our Saturdays tailgating in an old RV my brother bought for $500 and painted green and yellow.

We had so much fun playing beer pong, cornhole and meeting other Oregon Duck tailgaters, but many moves and two children later, we missed those carefree days.

So, right around the end of August, a simple text that said, "OK see what you can find" gave my husband and brother the green light to go RV hunting for a vintage RV we could restore into Version 2 of the Duck Truck.

The Original "Duck Truck"
We found a 1987 Southwind 34' RV sitting on some acreage outside of Portland shortly after. It was a bit over our original budget, but was a sound piece of metal, very clean, and most importantly--it smelled good. So, one long drive over the mountain and The Donal Duck Truck was a reality.

We spend the next month searching for fabric in the remnant piles of JoAnn's, reupholstering the seats, removing carpeting and spraying the entire inside white.


THE BEFORE
The Bedroom Before and After
RV Remodel Before and After
The Front Before and After
The whole RV was very clean but done in mauve furnishings with wood colored shelving. Made the entire space look very dark, drab and dated.

BEFORE: Sitting Area and Drivers Seat

BEFORE: Seating Area

BEFORE: BEDROOM
 DURING THE REMODEL
The first thing to come out was the carpeting. After carpet was pulled and a good cleaning, we were ready to paint.
Once all the carpet and furniture was removed, we were able to paint it. Warning! My dad is a professional painter so we had access to a professional sprayer and all the right tools but this was a PAIN! We had to sand down all the surfaces, tape for nearly two days, and then put on two coats of Kilz (four gallons!) and four gallons of paint plus primer. Then it had to dry for nearly two weeks.

While the paint dried, we went searching for fabrics to do the curtains, couch, and valances. I scoured fabric stores for bargain fabric, most of which was between $1.35 and $5 a yard (for the vinyl runs).

Once the paint was dry, we cut and glued down a vinyl floor. The flooring was $15.71 a linear foot (12 feet wide). 
THE AFTER: AN OREGON DUCK TAILGATER!

With the extra fabric, we recovered an old picture board. Everyone's favorite piece, however, is the battery-operated art deco light which was an impulse buy on clearance at Fred Meyer for $12.
After finishing the inside, everyone decided it was "too white and impersonal" so we fixed that by adding some pictures of ourselves at the Duck games to the cabinets. It was one of the most expensive parts of the decor, at $5.99/picture.


AFTER: The Bedroom. I found the comforters at Target for $25/piece (on clearance). The most expensive fabric was the Oregon Ducks printed fabric used to make curtains in the back.

AFTER: The dining area. To save money, we re-covered the dining table in diamond plate vinyl contact paper which I found online for $30/roll.

This green vinyl was a lucky find at only $5, but there was only two yards of it, so we had to use a green outdoor fabric on the back of the cushions and supplement the lack of fabric on the font with a green chevron outdoor fabric which we scotch-guarded. All and all though, it looks cool and is pretty stain-proof.
A simple fix to an ugly fridge? Cover it in stainless steel contact paper.

To save money and add something personal to the beds, we sewed pillowcases out of old Duck T-shirts.

Our one mistake was throwing out the old stained original mattresses and replacing them with standard twins, not knowing they were in fact extra long singles, not twins. So, we still have to build out the bed frames. Because the beds are wider than the originals, we had to replace the built in bedside table with a smaller one.

AFTER: The Kitchen. We didn't do much here, just covered the fridge and painted it white.

The kitchen

Pictures, pictures everywhere!

AFTER: The Backside.

AFTER: The left side. My husband sewed all the seat covers and upholstery. I think it looks amazing! We chose to do the couch in a brown fake leather, inspired by a football.

Still need to do the drivers seats which are currently just covered by UO seat covers. Notice the grey carpet in the front which we also replaced. Only $.50/yard at Lowes.

Check out the upholstery job on the chair!
I absolutely LOVE version 2 of the Duck Truck! Look for us at the games!

Thursday, April 16, 2015

Old Tackle + New Bucket + Spring Flowers = Porch Display

Spring is here, and my husband was itching to put his green thumbs to work, so I was sifting through Pinterest when I saw a picture of two buckets of flowers on a pully system. I really do hope copying is a form of flattery, because I had a vintage tackle I bought a few years ago that I was dying to use for "just the right project", and I was convinced this was it.

Pully Spring Flower Display

To make this front porch bucket beauty, you'll need:

1. Two galvanized buckets (about $10/piece from The Home Depot)

2. About six feet of rope depending on how high you are hanging it

3. Some filler rock and potting soil

4. A vintage fishing tackle or pulley (I found this tackle for about $30 at an antique mall)

5. Flowers (I would use flowers, filler, and a grass or moss)

6. Large eyebolt


The assembly is easy!


Just drill holes in the buckets, layer with rocks, and fill with dirt and flowers. Hang the vintage tackle or pulley with a u-bolt, fish the rope through, then have a big, muscle bound husband hold the buckets in place while you tie fancy knots.


You'll be surprised to find that the buckets stay in place because of the rope friction and the weight of the buckets, but if they don't hang to your liking, play with the weight using more or less rock.

Thursday, February 5, 2015

Creating a Home Office Space (Part 2)

My New Home Office Space


If you've been following my blog for a while, you may have remembered a post about Creating a Home Office. It was my first post, because I launched this blog the same time that I launched my business, Socialeyes 24.7 Social Media Consulting.


Version 1 of my Home Office circa 2011


Well, a lot has changed since I started Socialeyes Consulting. My business has quadrupled, I had another child, and I have become a much better not-so-newly domestic! But what hasn't changed, is my home.

Last week, I came home to my crazy daughter and went to login to my computer and found this:

The aftermath of the iMac and the Sharpie


Yup, Sharpie. So...that, combined with a growing business, growing file cabinet, and ever-more curious daughter, led me to search out my home for new home office space.  The solution? An un-used walk-in closet in our guest room (formally my sister's room and second master).

The space was rather perfect. It's a 10' x 5.5' space, rarely used, in a quiet area of the house, and best of all--it has a door! So here's the before (when we were using it to store the kids toys) and after.

BEFORE - storage closet;          AFTER - home office


First, we took out the shelving.
Closet minus the shelves: A blank space to work with.


Then, because there is no power in the closet, we drilled through the wall to the other room's outlet and inserted conduit to run the power through.

No outlet? No problem! We ran a cord to an outlet on the other side of the wall.

Time for the fun stuff: paint, desk, and office trinkets! I tried to find colorful and inspiring pieces for everything from paper clips to notebooks. I also tried place items that spark my creativity and house knowledge, like a a colorful magnetic calendar, a globe, a pin-sculpture that makes impression art.

An open-concept desk from World Market plus a plant, some storage boxes, and creative, personal items.

I love fun storage solutions. These are pieces I found for less than $10 at Ikea.

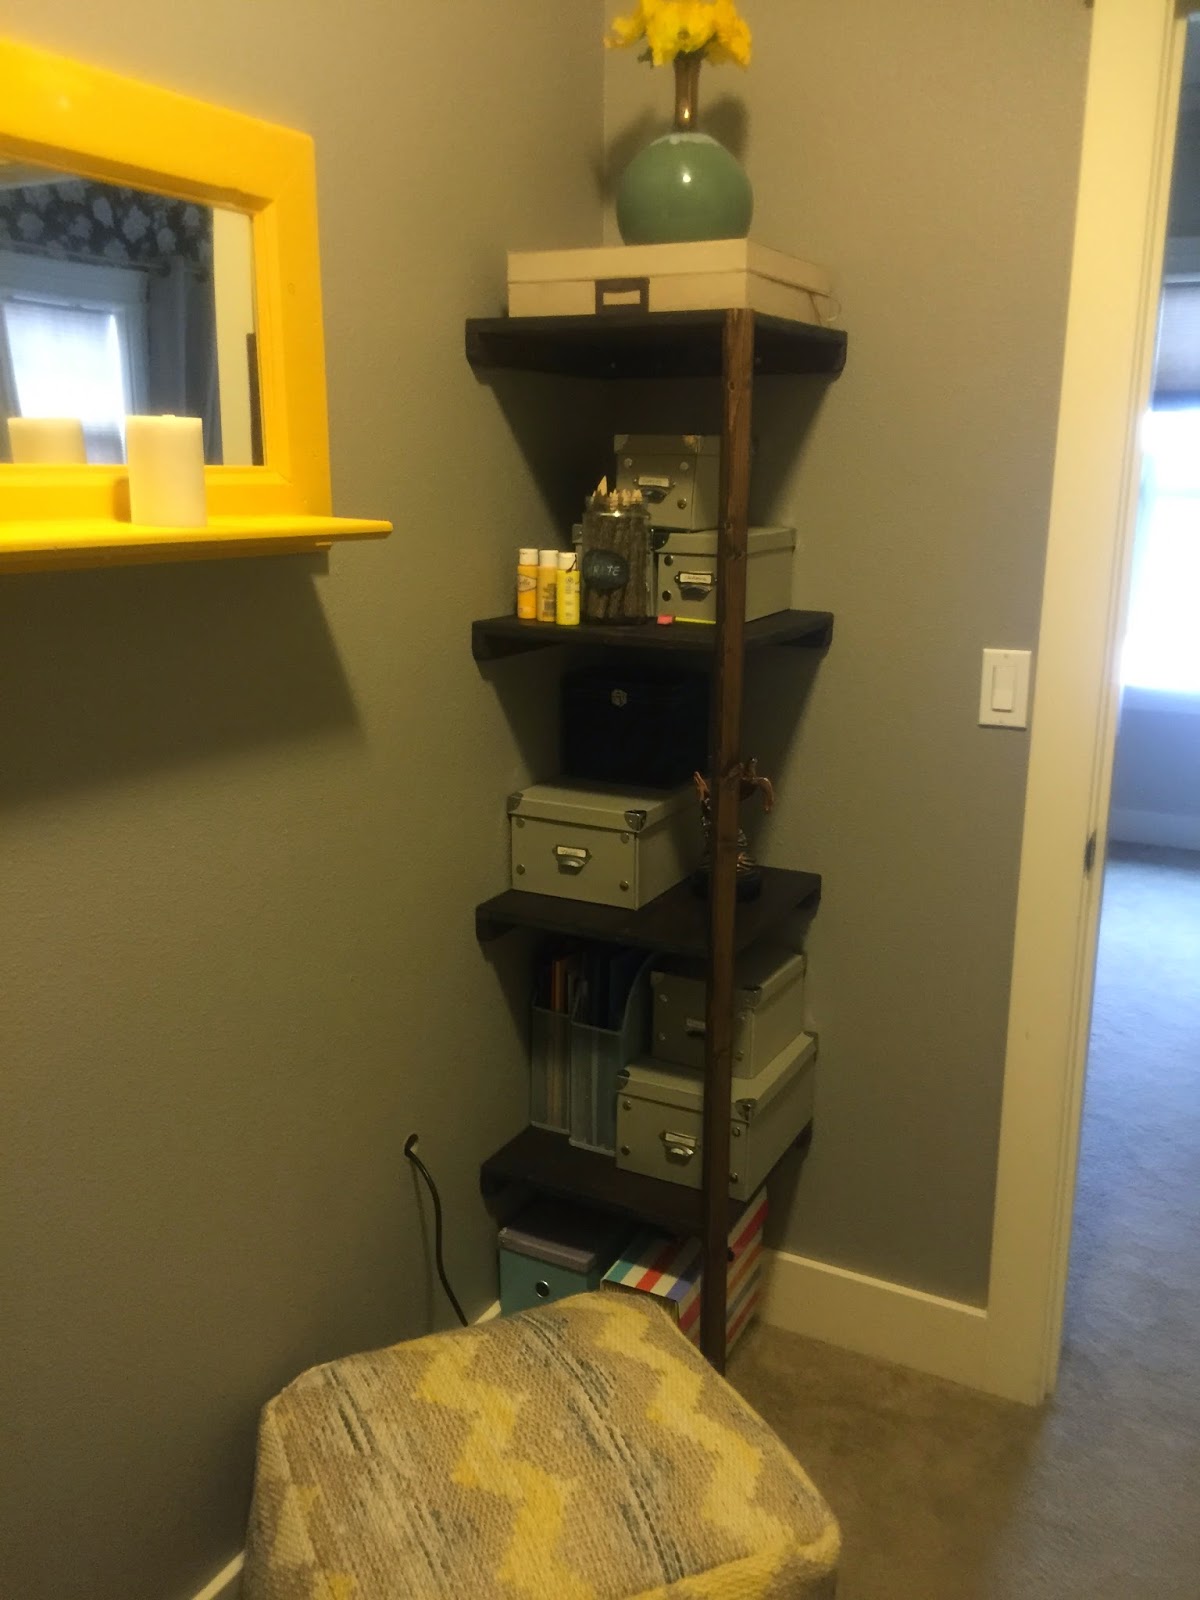
After staging the office, I realized there was still not enough storage for files, media, and supplies. I found this amazing piece at World Market, but the $329 price tag was a little rich for my social media salary, so my husband took $20 and built me some shelves reminiscent of World Market Bookshelves instead. I think it turned out amazing!

$329 World Market Shelves vs. $20 Handmade Shelves

Finally...the room needed something more. The grey paint, though neutral, made it fill institutional and dingy. So, I took an old $10 mirror, had my husband make a frame and shelf for it, then painted it yellow. But it still didn't work with the space.

Too yellow! I often make mistakes when visualizing a room, and this was one of them. But...

Inspired by a craft box I picked out for the space, I decided to mute the yellow by placing a lighter coat ontop, then sanding it down for an aged look, and then my husband created some art on the corners to draw in the entire space. It's just what I needed: a splash of color and creativity!

A small detail goes a long way!
My space is a perfect reflection of me and my business now: colorful yet safe, sophisticated yet creative, and more than meets the social-eye!